In this video, we will preview the courses you have available, how to create a course enrollment and some best practices as you do so!
Step 1: Navigate to Manage Content

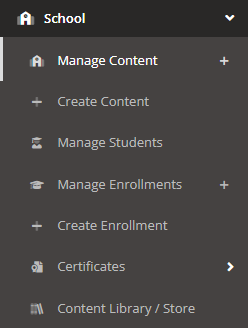
To see the courses you have available to you, first navigate to the left side of the screen and choose the option School. Next, click on the option Manage Content.
Step 2: Navigate to Preview

To preview the content within a course, navigate to the downward arrow next to View and press Preview. This will bring you to the course without needing to enroll yourself in the course first.
Helpful Tip: The Hook Security Team recommends first enrolling users in one of our 2 annual trainings, Wilderness Jack or PsySec Essentials, and then 1 shorter course each month preceding.
Now that you know what course you would like to enroll your users in, it’s time to create an enrollment!
Step 3: Navigate to Create Enrollment

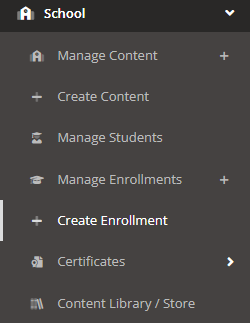
To create an enrollment, first navigate to the left side of the screen and choose the option School. Next, click on the option Create Enrollment.
Step 4: Choose Settings and Create Enrollment


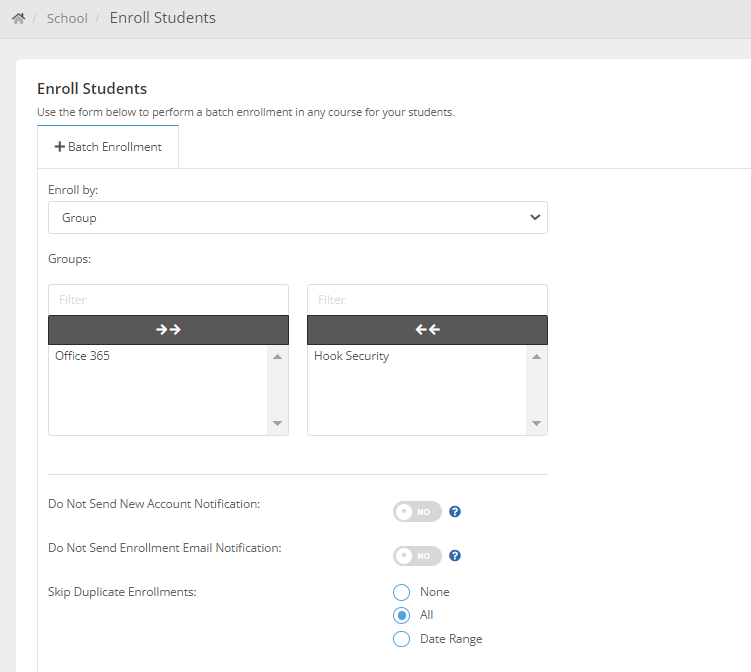
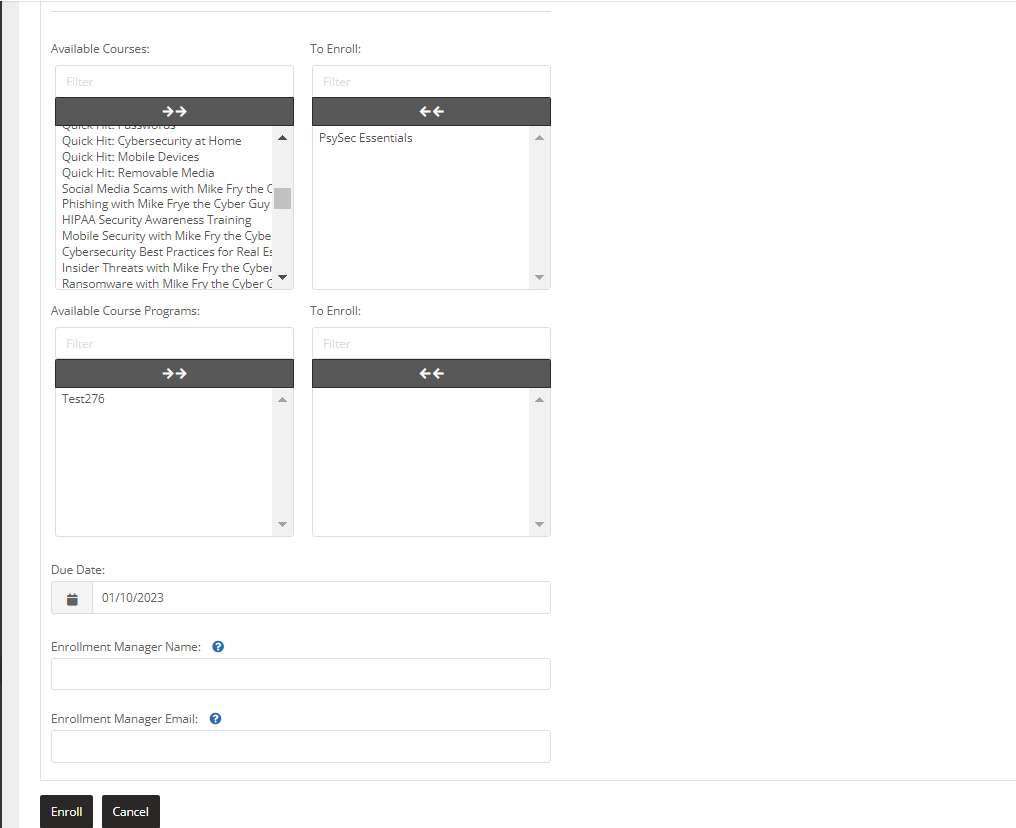
From this page, you will select the Group, Skip Duplicate Enrollments, Select the Course, and have the option of adjusting the Due Date and Enrollment Manager Name/Email.
Step 5: Press Enroll
You now have the power to enroll your users in a course! Well done!
If you would like to review your default school settings before officially enrolling, feel free to navigate to the left side of the screen to Administration>Settings>School Settings.


