There are a ton of features within our platform that allow for customization; including creating a course. And although we have an extensive training library, there are some instances where one might want to upload their own content. This gives you the option to roll out existing training content or create training specific to your company.
So let's take a look at how you can upload your own content to the platform.
Step 1:
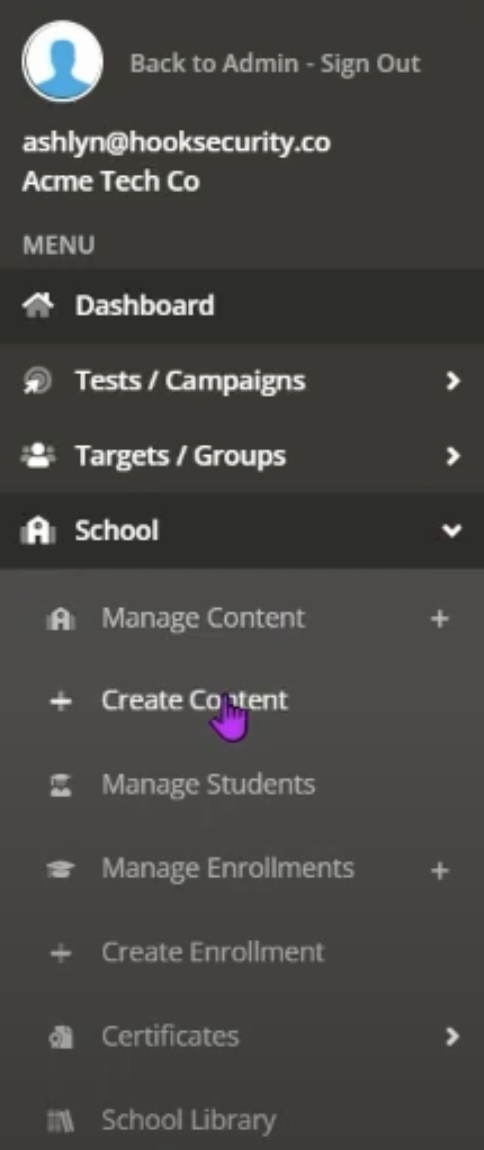
From your dashboard, navigate to the menu located on the left of the screen. Choose the option titled "School." From the dropdown menu, click on Create Content.

Step 2:
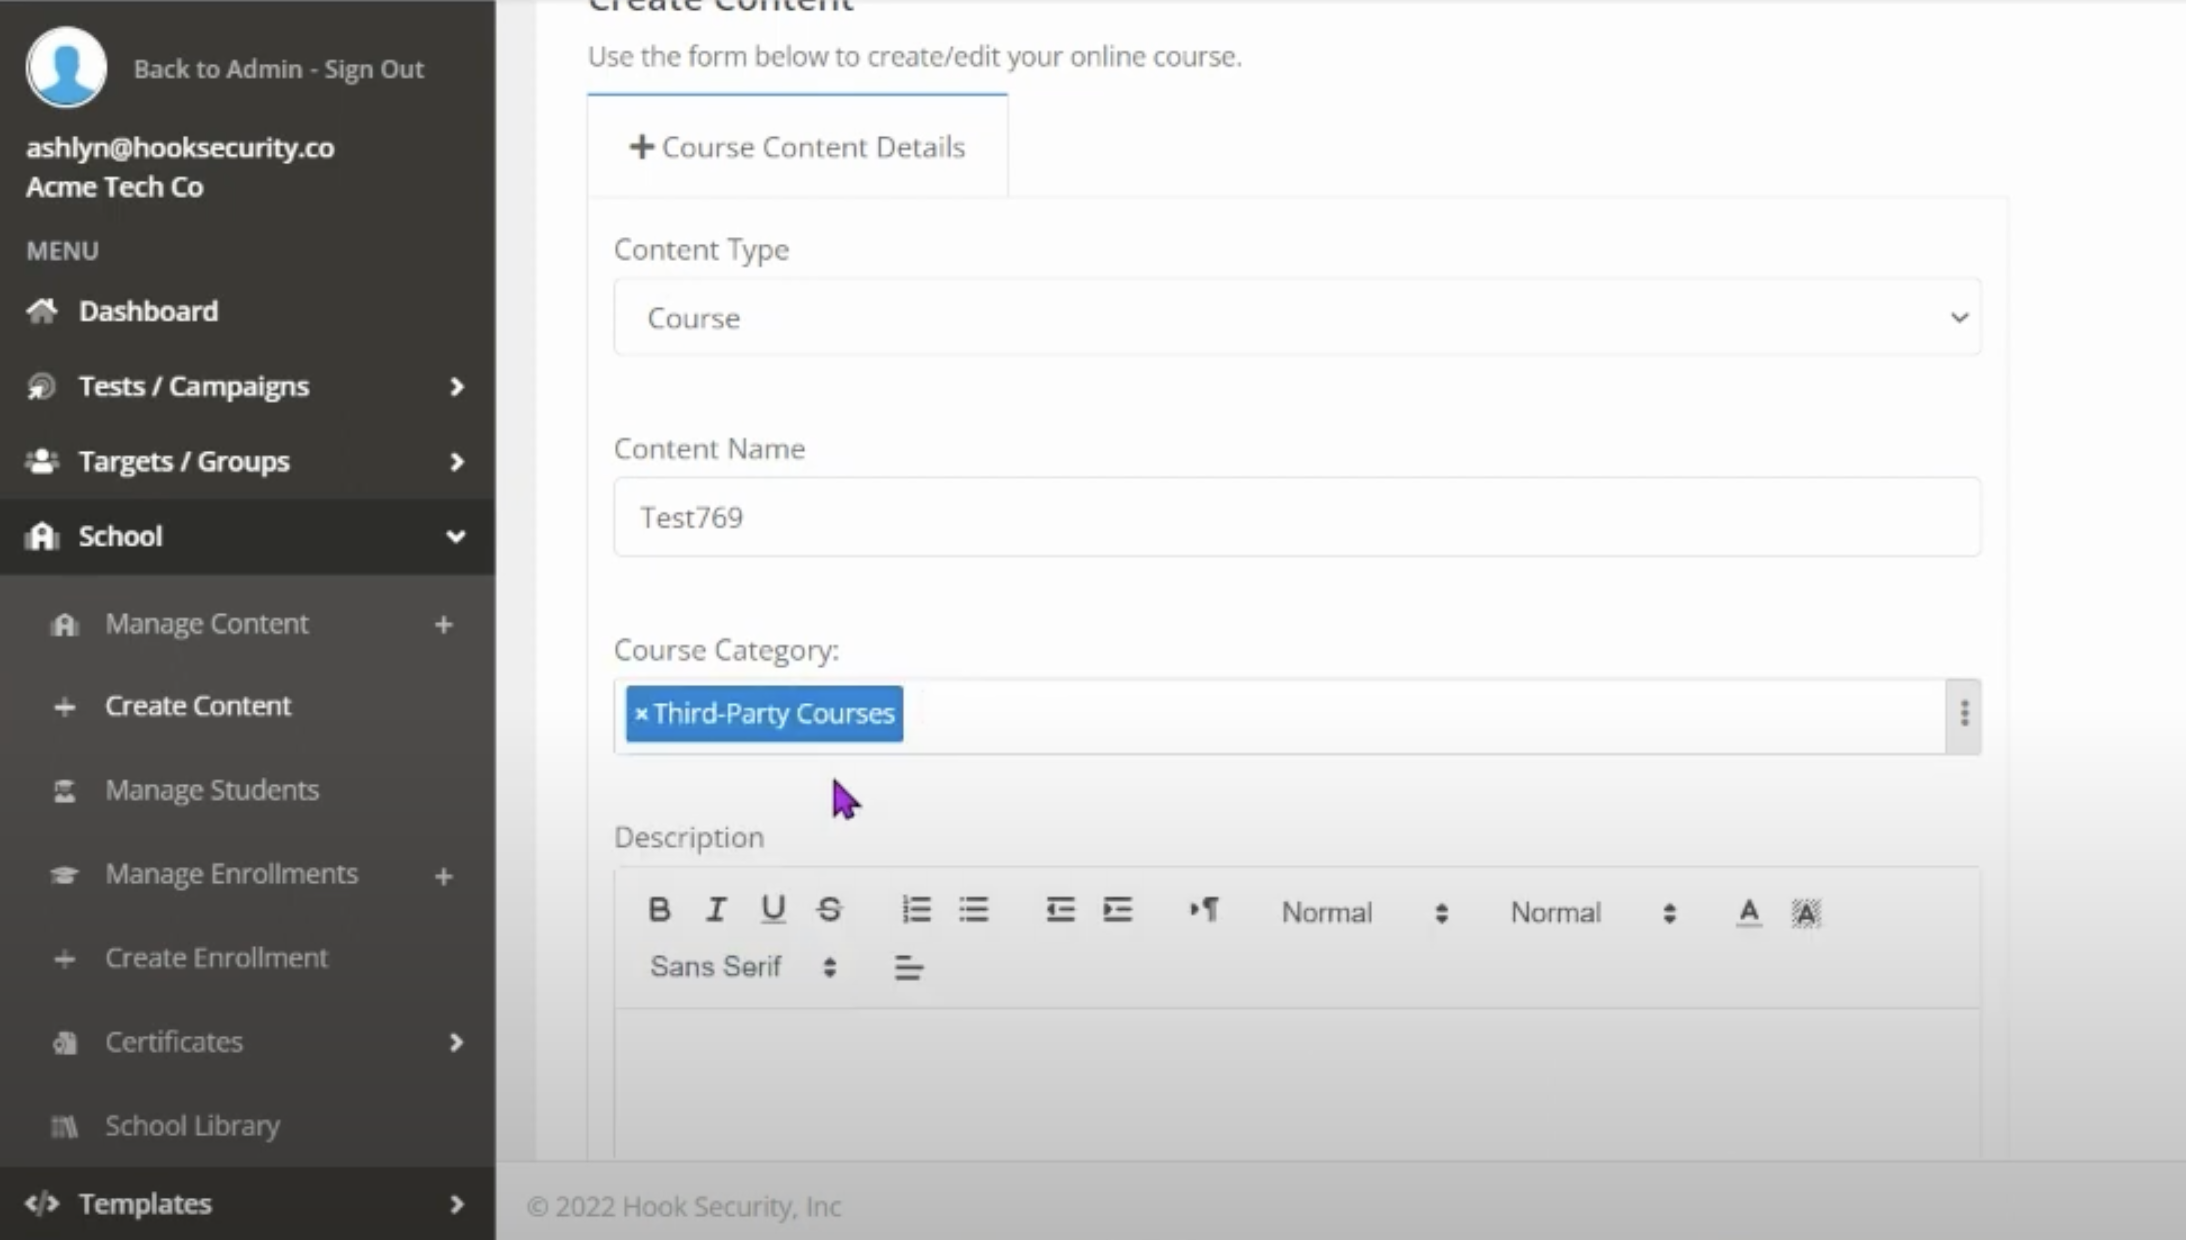
Once on this screen, you can then start customizing and labeling your content. For Content Type, choose the option labeled "Course." You can then give your content a name. For Course Category, choose the option titled "Third-Party Courses." Lastly, give your course a description to let others know what your course entails.

Step 3: (Optional)
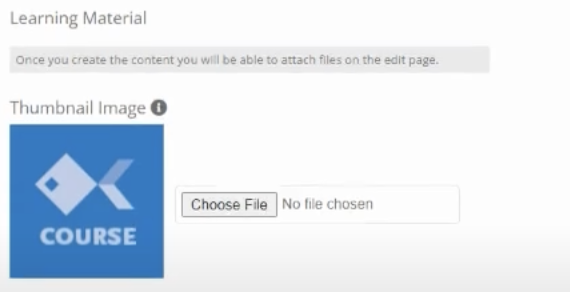
You are also given the option to upload a custom thumbnail image. This image will be displayed in the course library and can showcase what your course is about. Once finished, click create.

Step 4:
Once you're on the next page, you are given the option to upload your course content. This content can be in the form of a video link, slideshow link, SCORM file, or even a PDF.

Step 5:
Once your content is uploaded, scroll up to the top and choose "Questions." This option allows you to add questions to your course. You can do so by clicking the button on the right titled "Add Question."

Bonus:
Not only can you add questions, you can also set your pass/fail criteria. By adjusting the slider on the right, you can choose how many questions a user is allowed to get incorrect before failing your course.

We never want to limit your training! That's why you have the ability to create courses, and so much more, within the platform! Get your free trial here and start creating your custom courses today!


